Saturday, April 29, 2006


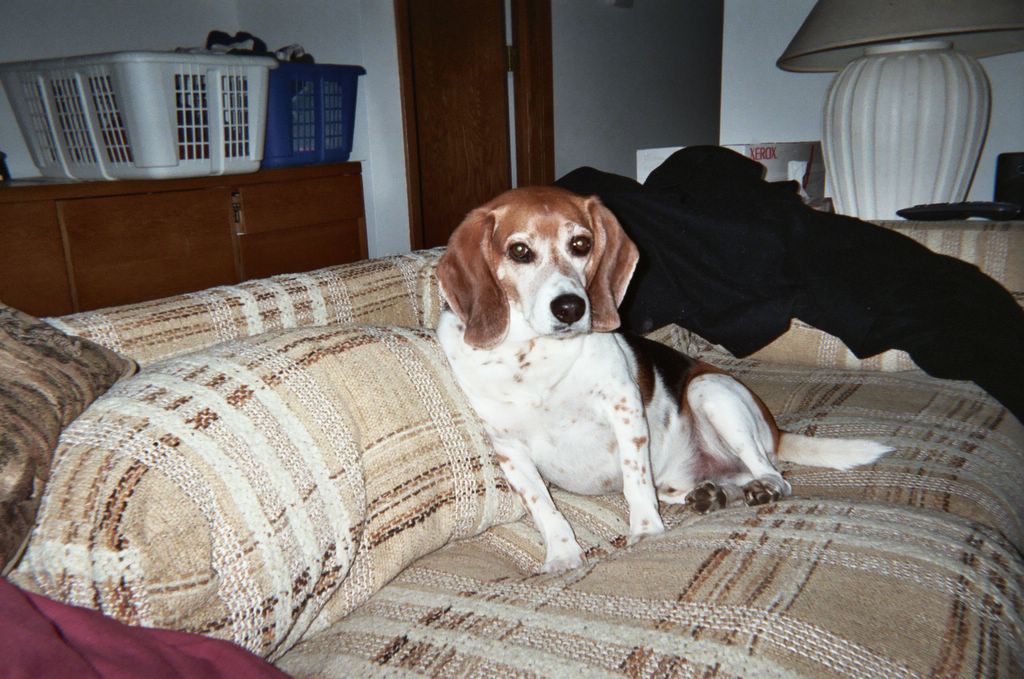
Here once more to break up the bike action is Sparky The WunderBeagle. He resides with my kids and my ex as he's a very social dog. I have him over only when I plan to stay home and not stress him out by putting him in the kennel all the time. He has his peculiarities, but I love the boy to death. He's about nine years old in this photo, taken about the same time as the QuickBeam build. Posted by Picasa

This is the finished bike as I've been riding it. I like the Moustache bars a lot and the tape once shellaced is okay. Not perfectly happy. I've since upgraded the saddle to a honey B17 Champion from Hiawatha so the B17 can go back to my tandem. Yes, I added a dirt drop stem to the M-bars. And if you look carefully there is a ToPeak frame pump under the top tube. I love my QuckBeam! Posted by Picasa

This is midway through the wrapping. You can see in the background that the right side of the dashboard is complete and this is a photo of the left side, with only the white electrical tape (instead of blue) over the padding only. This allowed me to compress the padding in place so it stayed evenly on the top of the bar. I liked how this came out. Posted by Picasa

This was my first attempt at running the bar padding under the bar tape directly. Look closely and you see that as I went along it seemed almost impossible to keep it from sliding in the direction of the bar tape. The truth was it was compressing in one direction and not only looked funny, it felt funny. I was disgusted at this point and quizzed others for ideas. Note: The grey tape has made an appearance rather than the medium blue. Posted by Picasa

Second fender photo that didn't get there the first time. Now back to our regular scheduled assembly. Posted by Picasa

Fender photo that didn't get onto the blog the first time. Posted by Picasa

A shot of the first attempt at the ultra thick handle bar padding and the sweet gum Crane Creek break levers. I used blue electrical tape on the white and yellow padding still thinking I'd go with the blue handlebar tape. You can just see the Berthoud leather mudflap on my mudguard. Oh, and the Hiawatha watter bottles in the cages. Thanks boys! Patronize them too please!! Posted by Picasa

There should show three photos in one entry here. All are to show the nearly final installation of the fenders. I fiddled a lot with them and am not quite satisfied. They came with button allen wrench scews on the stays for one thing. Since I have to remove them to get the rear wheel out for gear changes, I want something a little more robust in terms of regular removal. I think their idea was to reduce applying too much torque and crushing the snot out of the plastic stay holders. I think that makes good sense. I'll just have to be careful. Posted by Picasa

This shots shows some more of my cotton handlebar tape work with the ends trimmed with Hemp twine and then shellacked. In this case it is more medium blue tape with clear shellac. I was disappointed at this point as how dark it became. I had intended to use it on my handlebars, but changed direction after this point. You can also see the rear fender poorly installed at this point. Posted by Picasa

Here is the inside of the Hoss to give an idea of how huge it is. Later I added leather thong (coated in Proofide of course) to help close the inside when needed. This shot was to show the piece of cardboard I shellacked. Yes, I cut it from the original box and managed to get the entire word "Quick" from the QuickBeam box. Oh the silly things I find fun and entertaining? Posted by Picasa

Here is a shot with the original saddle (borrowed from my tandem) and the big ole Hoss saddlebag. this is a later step as you might be able to see that the saddle post has blue shellacked cotton bar tape on it to cover its blackness. No, I don't ride with the saddle at this ridiculous angle. Adjustment came later. Under the saddle bag is the Bagman Expedition saddle support direct from my pals at Wallingford. Please patronize them. Posted by Picasa

These are the good old MKS touring pedals the QB got. Complete with extra large toe clips to fit most any shoe I own and longer than usual straps to do the same. Lovely pedals, I went with the little more expensive ones with a little more sideways clearance. With the intent of running the bike in fixie mode, it could be in handy. Posted by Picasa

One of the first anal steps for me is a frame wax job. Okay, more than one and that's all I'm saying. I really gobber it on and lovingly remove it and polish it. Its something I really enjoy and take a ridiculous time doing. I did the first coat without the bottle cages and the second with, as they make great carry handles. Posted by Picasa

I was suprised to find the breaks installed, the headset and bottom bracket, the crank, rear wheel and chain all installed as well as both tires and tubes. The tires were even pumped up when it arrived. The packing job was great, no scratches. In this photo you can see the black and white saddle on the Armstrong I hope to take on the three speed tour, and the saddle of my Atlantis. Posted by Picasa

Here is the start of the feared and dreaded QuickBeam assembly. I'm pretty anal, so this isn't for the weak hearted. To the left you can see my QB out of the box on the workstand Posted by Picasa